
Teams do not start with a clean analytics install. They start with a dashboard that looks close enough to trust, then a client points out that one landing page, one checkout step, or one campaign source never shows up in the numbers. At that point, the problem is no longer “how do I add the Google Analytics tracking code,” it's “where did the install break, and what else is missing because of it?”
That's the right way to think about tracking code Google Analytics work in 2026. The snippet is not a marketing checkbox, it's a deployment artifact that has to be installed, verified, and governed like any other production dependency. If you treat it that way, the data gets cleaner, the handoff to developers gets easier, and the reporting stops drifting every time a template changes.
The Partial-Install Trap: Why One Missing Template Breaks Attribution
A common agency scenario goes like this. The homepage fires GA4, the blog fires GA4, and the client's leadership dashboard looks healthy enough to pass a quick glance. Then someone checks a pricing page, a gated demo flow, or a post-purchase route and sees that the property is blind there. At that point, the report is mixing measured behavior with missing behavior, and the gap is already shaping how the account gets read.
That gap matters because Google's setup model depends on the tag being copied exactly and added to every page you want to measure. When coverage is partial, the property still collects data, but it is collecting a distorted version of the site, and campaign-source reporting starts to drift fast. Google's own guidance says the snippet belongs on every measured page, and one broken template can throw off sitewide behavior capture across page views, clicks, and time on page (Google Analytics support).
What partial coverage really breaks
A half-installed snippet usually does not fail loudly. It creates small pockets of missingness that look like normal variation until someone tries to explain a drop in conversions or a strange source mix. If the landing page does not carry the tag, the source and medium attached to that visit may never make it into processing, which is why agencies see incomplete attribution when only some templates fire.
Practical rule: if the code does not run on the landing page, the rest of the funnel is already compromised.
That is why I treat the tracking code as a release artifact. It needs a property-specific identifier, a clear template map, and a verification pass, not just a paste into a CMS field. The work is checking which templates emit the tag, whether the same property is being installed more than once, and whether the pages that drive revenue are covered before the campaign goes live. If your team is also working on SPA or client-side routing patterns, keep the install discipline just as strict as you would in a traditional multi-page build, and this guide on SEO in SPAs is a useful companion.
Finding Your GA4 Measurement ID and the Legacy UA Tracking ID
I once had a client send over a screenshot showing a UA- ID pasted into a GA4 property. The install looked fine at a glance, but the report stayed empty for three weeks because the tag was pointing at the wrong place. That is the kind of mistake that turns a simple setup into a cleanup job.
Before you can debug anything, you need to know which identifier you are looking for. In GA4, the path is Admin → Data Streams → Web stream details, where the Measurement ID appears in the G-XXXXXXXX format. In old Universal Analytics, the path was Admin → Property → Tracking Info → Tracking Code, and the legacy identifier used the UA-XXXXXXXX-X format (tracking ID guidance).
That difference sounds small, but it is the source of a lot of migration confusion. Teams keep older docs, copy stale screenshots, and then paste the wrong identifier into a fresh setup. Google's own legacy wording now labels the old flow as [UA] Set up the Analytics Google tag [Legacy], which is a clear signal that the install path changed and the old identifier should not be treated as interchangeable with GA4.
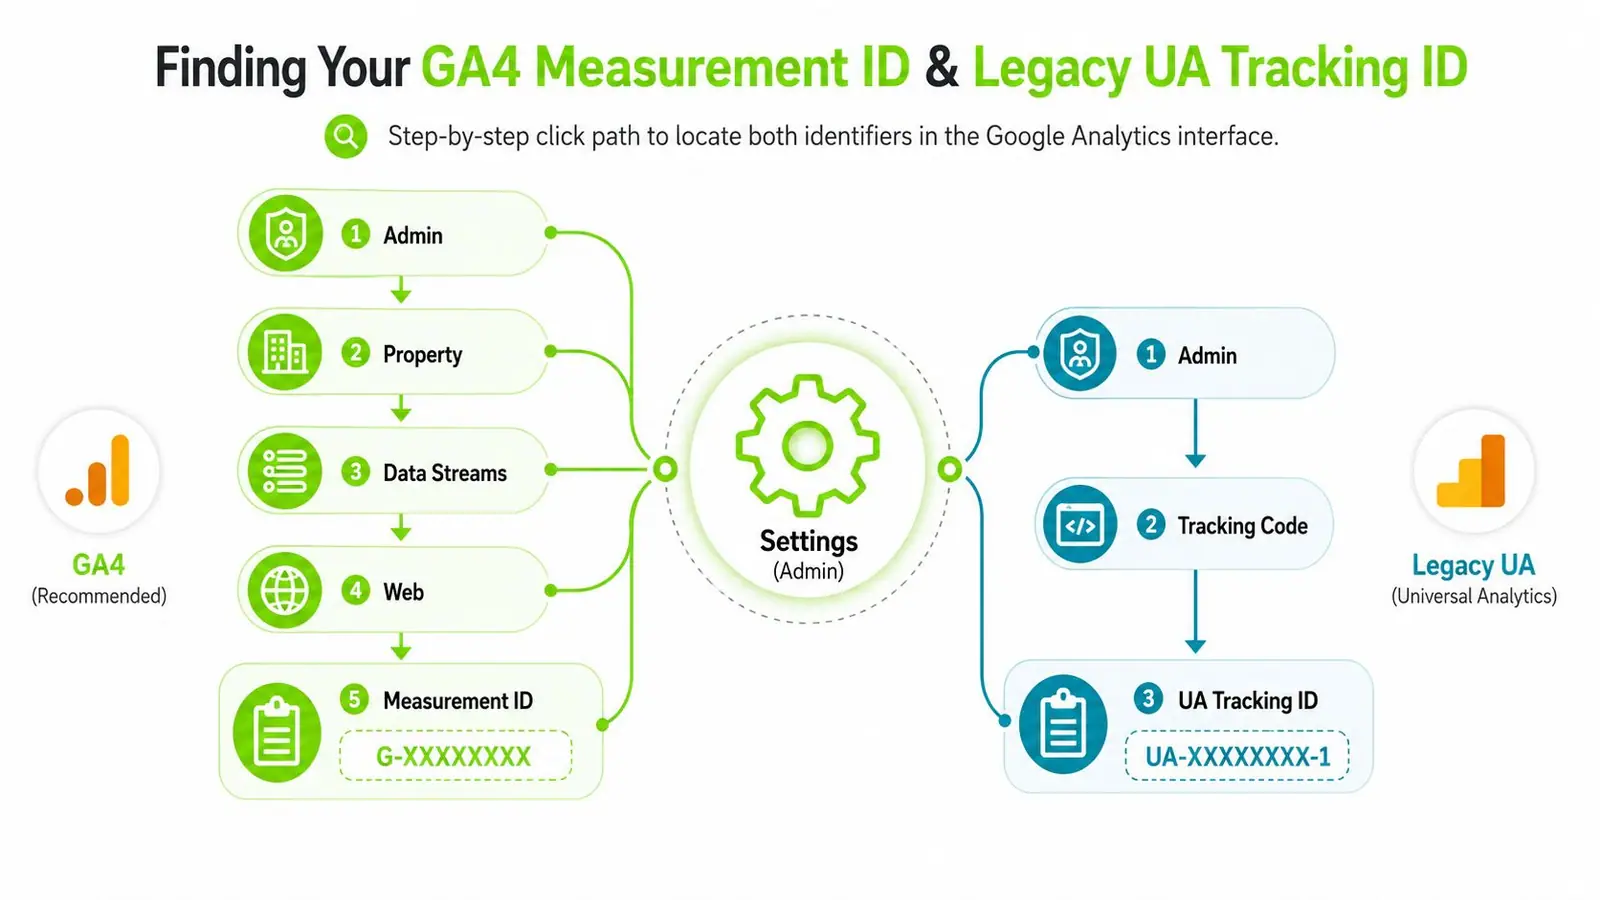
How to avoid copying the wrong ID
Open the exact property you intend to install, confirm whether you are in GA4 or a legacy UA property, and copy the ID without editing it by hand. The identifier is what ties browser activity to the correct reporting destination, so even a small mismatch gives you a tag that looks valid but sends data to the wrong place.
Keep an eye on multi-property setups, too. Agencies often inherit accounts where several properties sit side by side, and the wrong tab, the wrong screenshot, or the wrong sticky note is enough to send the install off course. If the property name and the ID format do not match, stop and verify before the code goes live.
Copy the identifier, do not “fix” it. If it is wrong, the report will still look empty.
That matters most in mixed estates, where some clients still keep older documentation while others have already moved to GA4. A clean install starts with the right identifier, not the right snippet shape.
Three Real Install Paths and When to Use Each
There are only three legitimate ways to ship the Google Analytics tracking code in a sane way, and each one has a different maintenance burden. The direct snippet in the page head works best when you fully control the site code. CMS template installation fits WordPress, Shopify themes, and other templated systems. Google Tag Manager earns its keep when multiple tools, multiple owners, or frequent changes would otherwise create release pain.
Here's the decision pattern I use on agency work. If the site is static or lightly customized, direct head placement is fast and clean. If the site runs through a theme system, put the code in the template so every page inherits it. If the client already depends on GTM for ads, pixels, or other analytics tags, consolidate there so the deployment surface stays in one place. For a practical comparison of GA4 setup choices, the Tagada GA4 setup guide is a helpful reference point, especially when a team is deciding between native code and tag management.
| Choosing the Right Install Path | |||
|---|---|---|---|
| Method | Best For | Maintenance Cost | Best When |
| Direct head snippet | Custom-coded sites | Low if code access is stable, higher if releases are tightly controlled | One team owns the whole stack |
| CMS template | Theme-based sites | Moderate, because template changes can affect coverage | The same layout repeats across many pages |
| Google Tag Manager | Multi-tag setups | Moderate to high at first, then lower as more tags move into one place | Several marketing tools share the same deploy path |
What to choose, not what sounds modern
GTM is not automatically better. It's better when you need controlled rollout, testing, and rollback across tags. Direct code is not outdated. It's often the least fragile option when the engineering team can keep it in the source of truth and won't accidentally strip it during a theme rebuild.
If your team manages multiple client environments, keep the install method tied to the operating model, not to trend language. The right fit is the one that leaves the fewest places for drift. For broader stack planning, this overview of digital marketing technologies helps frame where analytics belongs among the rest of the client's tools.
Where the Code Goes in Your Pages
Google's setup guidance is direct on this point, the Google tag or gtag.js belongs immediately after the opening <head> tag on each page you want to measure (Google Analytics support). That placement is not ceremonial. It gets the library into the page early, before interaction scripts start piling up, while still relying on asynchronous loading so it does not hold rendering hostage.
The implementation detail matters because the snippet creates a new script element, marks it asynchronous, and inserts it before the first existing script tag. In practice, that gives you early collection without making analytics the thing the browser has to finish before the page can move on.
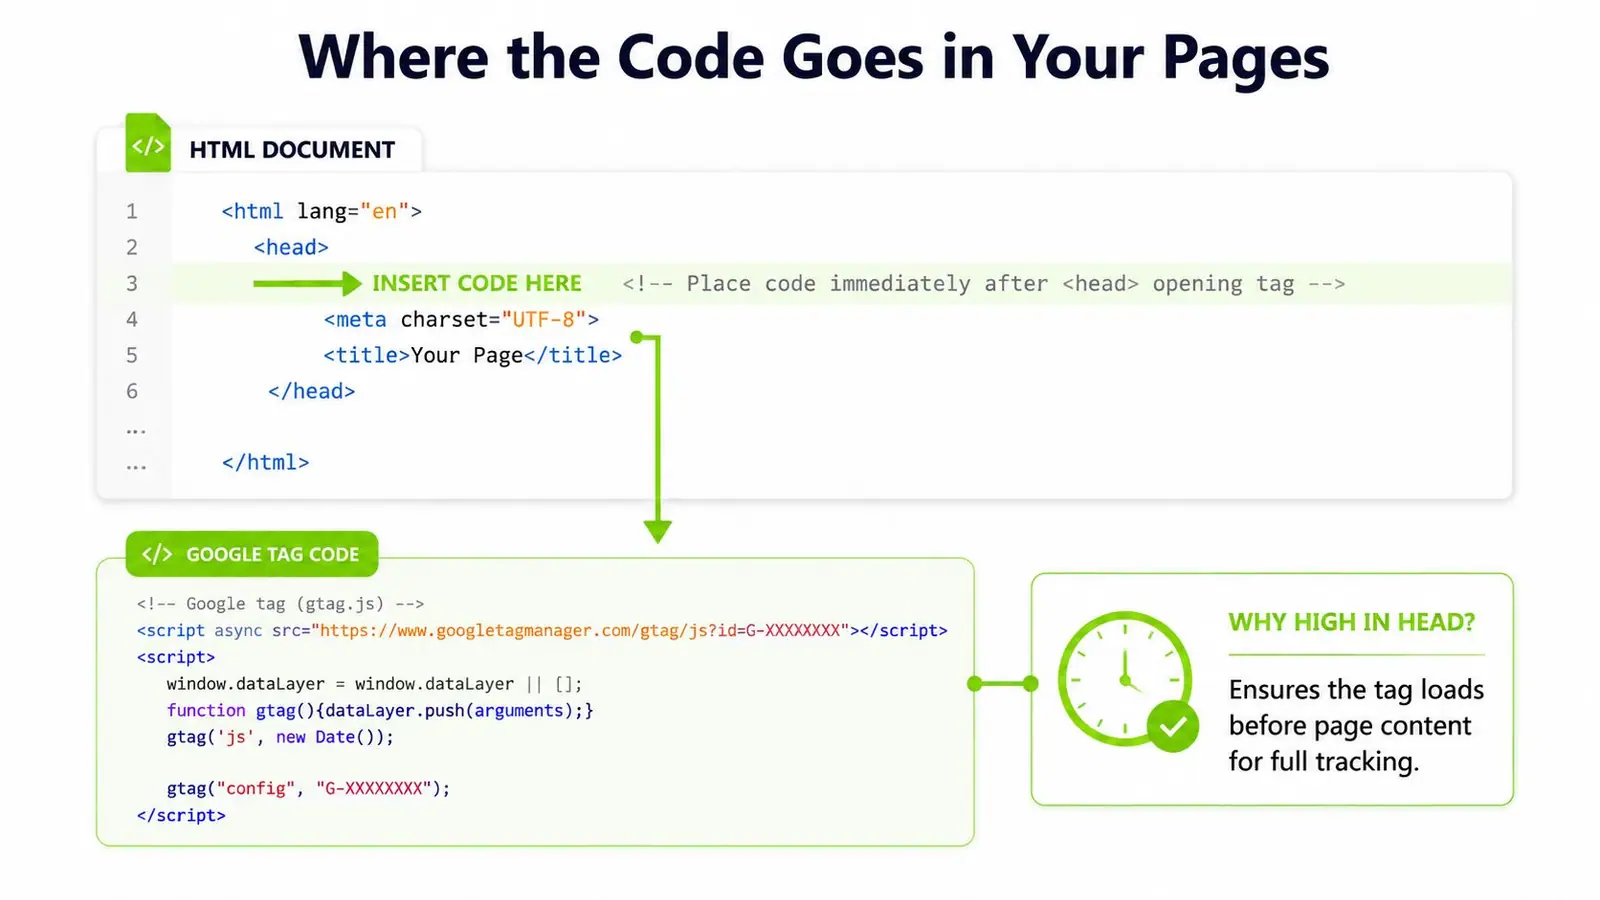
The placement rule that gets ignored
The most common failure is incomplete coverage. A team adds the tag to the main layout, then leaves out the checkout template, the locale variant, or the include file used by one route group. Measurement still looks alive, but the gaps stay hidden until someone maps the templates against the rendered pages.
Conditional firing creates a different kind of problem. A snippet that only runs on some routes produces partial data that can look legitimate for weeks, especially if no one checks the actual HTML output. Sites with multiple locales, nested templates, or server-side includes need an audit of the rendered page, not just the CMS field where the code was pasted.
High in the head is the default for a reason. It reduces the chance of late firing and avoids the quiet omission that happens when one template branch never gets the snippet at all.
Verifying the Install Is Firing
A pasted snippet can look fine and still fail in practice. Start with the browser, move into Google's tools, then confirm the property is receiving hits in the right place. The point is to verify that the tag is present in the rendered page, active in the session, and tied to the property you meant to deploy.
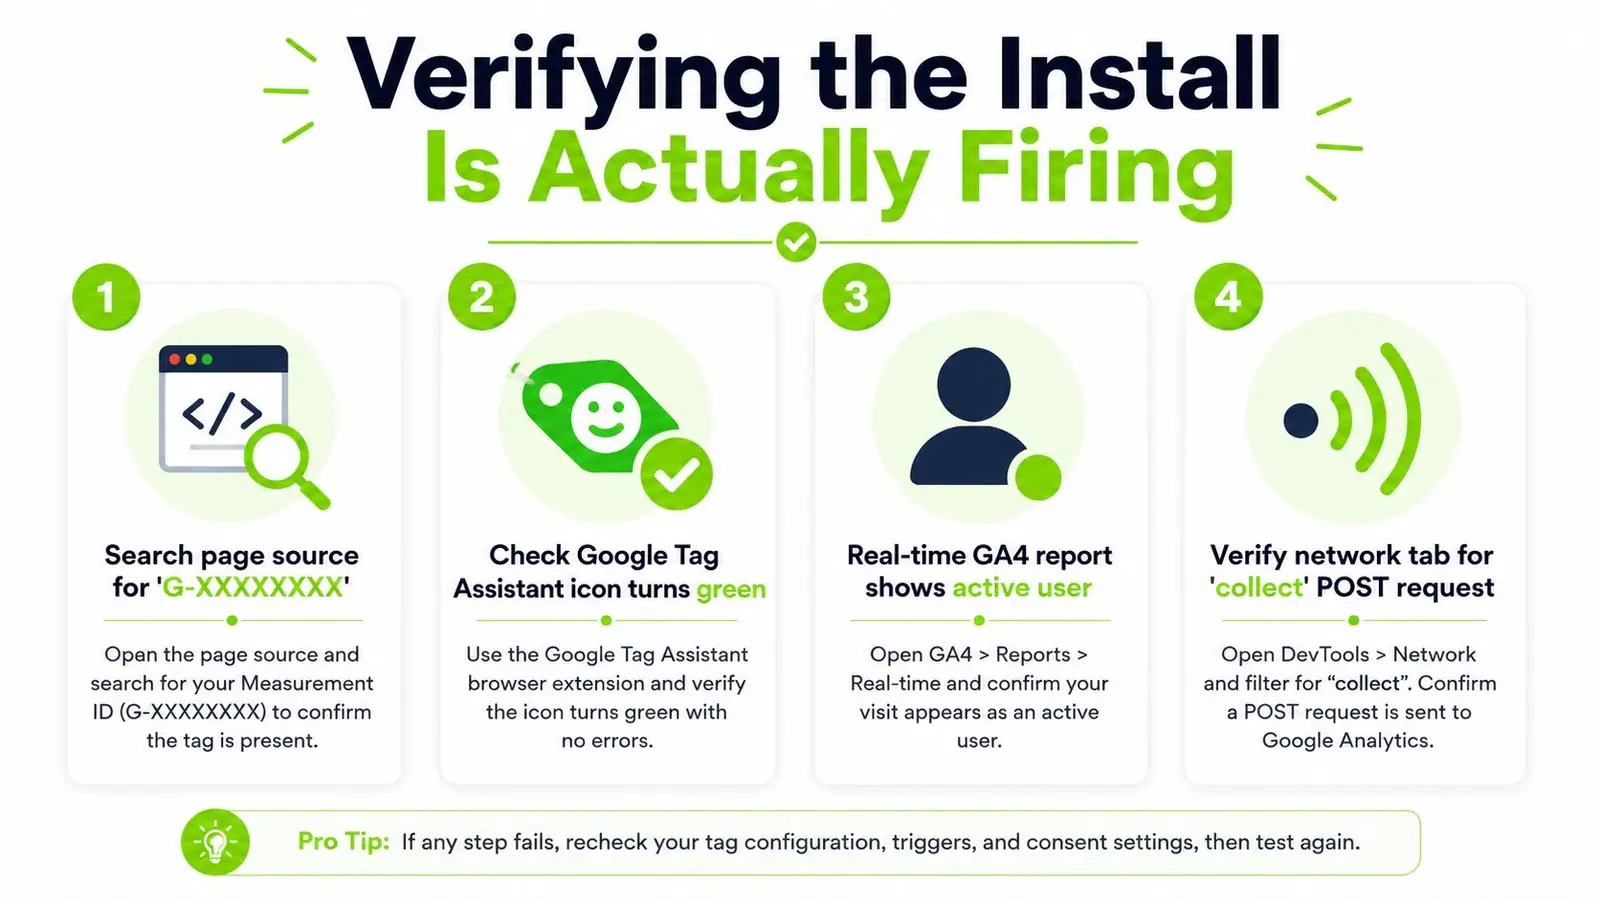
The four checks that matter
- Search page source for the Measurement ID. If the code never appears in the rendered HTML, the deployment never landed. A visible
G-XXXXXXXXmatch in source is the first proof that the tag is present where it should be. - Use Google Tag Assistant. A healthy install should show the tag as active rather than missing or broken. If the assistant is green, the browser side is usually fine, but that still leaves property routing to verify.
- Open GA4 DebugView. Check that your own events arrive in the correct property, not just somewhere else in the account. DebugView is the cleanest signal that GA4 received the hit from your browser session.
- Check Realtime. A live user or active event in Realtime confirms the processing path is working end to end, not just in local debugging mode.
Google's setup workflow says to create the property, deploy the exact tag to all measured pages, and verify that requests are collected and processed into reports (Google Analytics support). It also warns that the wrong identifier or missing pages leads to inconsistent measurement. In practice, I check the codebase for the Measurement ID, then compare it with every route or template that should inherit it.
If DebugView shows hits but Realtime stays empty, the tag is firing and the problem is usually downstream. A property filter, a view restriction, or a mismatch between the stream and the live site can block the data after the browser has already sent it. That is the point where a quick check of the active property, stream settings, and any filtered traffic matters more than another round of page refreshes.
For a closer look at why weak engagement patterns can still point to setup problems, this note on bounce rate in Google Analytics is worth bookmarking.
Migrating From Universal Analytics Without Losing Your Mind
A UA to GA4 migration is rarely a simple code swap. In practice, it is a pile of custom dimensions, legacy includes, developer patches, and tracking workarounds that have accumulated over time. If the team installs GA4 without first mapping that history, the result is usually duplicate signals, missing custom setup, or a client asking why the old reports and the new reports disagree.
The biggest trap is dual tagging. Teams leave the UA snippet in place, add GA4, then spend weeks trying to explain inflated counts and mismatched sitewide behavior. One agency team left a UA snippet buried in a shared footer include, and GA4 pageviews looked doubled for six weeks before anyone traced the problem back to that template. The cleaner approach is to keep one property map per domain or stream, decide what stays only as historical reference, and remove the hardcoded legacy tag after the new implementation has been verified in the property.
What to keep, what to retire
Custom dimensions need special care because they were often wired directly into page-level code. Google's legacy documentation shows that implementation changes on relevant pages still matter when custom data is involved, which is a useful reminder that migration requires mapping custom dimensions, legacy includes, and developer patches, not just pasting a new snippet into the site (Google Analytics support). If the old setup fed reports that clients still reference, preserve the historical property, but stop letting it shape how the new stack is deployed.
Keep the historical property for history. Keep the live property for current decisions.
That separation avoids a lot of internal argument later. The old data can stay intact while the new GA4 setup becomes the source of truth for current reporting. The key is to keep the migration map explicit, so nobody has to reverse-engineer it from page source months later.
Agency Workflow for Multi-Client Installs
The agency version of this problem is governance, not just installation. One bad rollout can repeat across every new client if the team doesn't standardize property naming, tag ownership, and verification. The fix is a repeatable launch process that makes the install boring on purpose.
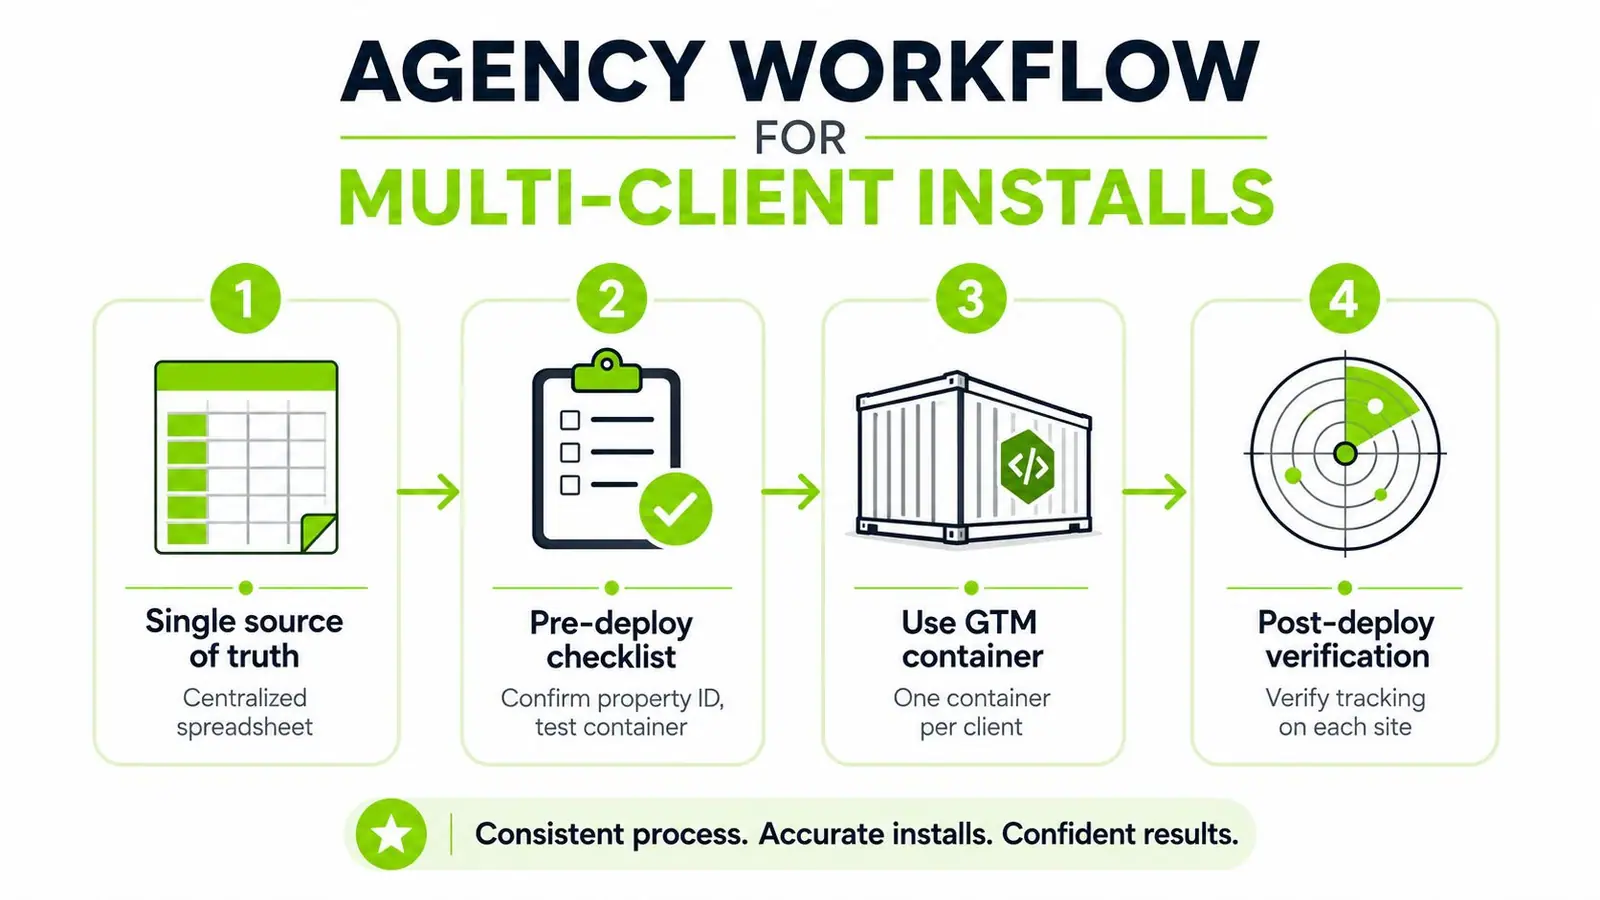
The checklist that keeps installs honest
- Single source of truth spreadsheet. Keep the Measurement ID, property name, owner, and live status in one place.
- Pre-deploy checklist. Confirm the correct property ID, test the container, and check the template coverage before launch.
- One GTM container per client. Shared containers make debugging harder and increase the chance that one change affects the wrong site.
- Post-deploy verification. Test each site route after launch, not just the homepage, and confirm the tag is firing in the browser and the property.
This is also where privacy defaults need to be set before the first tag goes live. If your stack serves European or California audiences, align consent handling before measurement starts, not after. A late privacy retrofit is much harder to clean up than a careful first deploy.
For teams juggling several domains and templates at once, this operational view of multi-site management is a useful complement. The habit to build is simple, keep one record of truth, one accountable property per site, and one verification pass per release. That's what separates a clean analytics install from one that haunts quarterly reporting for months.
If you need help turning analytics installs into something your team can trust, Surnex can help you organize the technical side of search and measurement work without adding more tool sprawl. Visit Surnex to see how a single platform can support cleaner reporting, faster audits, and more reliable client handoffs.